Kombucha, a fermented tea drink native to Asia, has taken the modern world by storm, the final accessory of the Birkenstocks, Fjallraven, Hydroflask, Pinterest-worthy hipster aesthetic that many of us aspire towards. But the effervescent success of kombucha extends much farther past twenty-first century media influences, in fact, the fizzy drink is seeped with a deep history. According to the Encyclopedia Britannica, kombucha is thought to have originated in China and travelled along the Silk Road to other parts of Asia, along with tea.
Kombucha is a fermented food (like sourdough bread, yogurt, kimchi, or sauerkraut). Bacteria and yeast in the form of a SCOBY (Symbiotic Culture Of Bacteria and Yeast) undergo the chemical process of fermentation, converting sugars into alcohols, which then are converted into organic acids like vitamin C and several B vitamins. In addition, Lactic and acetic acid lend the kombucha it’s signature sour flavor, and carbon dioxide gives it an effervescent punch.
The drink is also supposed to promote a variety of positive effects on health, including but not limited to inflammation reduction, immune system support, intestinal bacteria health, and improved joint function. However, more research must be conducted to verify these effects. Caution is always necessary when considering “natural” remedies.
Brewing kombucha is an ancient art that has resurfaced recently, and of course with supply comes demand. In my own experiences at grocery stores, seeking out the perfect fizzy fix, I have encountered brands that can cost more $5-7 for one bottle! Even locally brewed kombucha can get pricey with fill-your-own flask often going for similar rates.
I saw a problem and found a solution in a SCOBY. However, since I am only a beginner on this journey, I have provided some links to websites and videos I have found most helpful—and I strongly encourage you to explore the kombucha community as you start on your own journey too!
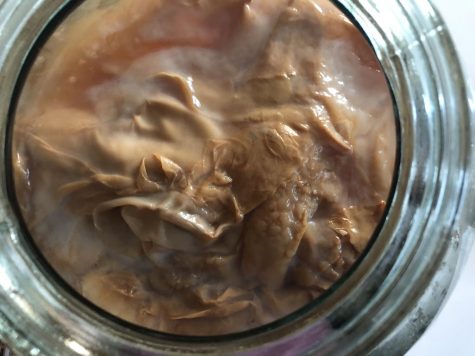
(Also, another warning: before you scroll down to pictures of the SCOBY, I would perhaps advise finishing your bottle of kombucha first if you have never seen one before. Carry on!)

A Quick Guide to Kombucha
What You’ll Need to Get that Glass (one gallon jar):
- A SCOBY (more on that later!)
- Approx. 2 cups starter kombucha (the more the better)
- 1 gallon glass jar
- 1 cup sugar
- 3 quarts water (divided)
- 3-4 bags black tea (or equivalent in loose leaf, plus a sieve)
- Covering for jar (large coffee filter, paper towel, cheesecloth) and rubber band
- Approximately one month!
- Mason jars, flip-top bottles, plastic water bottles
*A quick note on growing a homemade SCOBY
This will extend the time required to brew one batch significantly, at least for a while as the culture increases in size and strength. I obtained my SCOBY from a kombucha-brewing class, so I do not have much experience in growing your own. If this interests you, I would suggest checking out this website: https://www.thekitchn.com/how-to-make-your-own-kombucha-scoby-cooking-lessons-from-the-kitchn-202596
Preparation
- Wash your hands, remove jewelry and other accessories (bracelets, rings, etc.), and tie back hair! The SCOBY is a living organism and the kombucha will be consumed by people, so it is crucial to prevent contamination by using clean hands/utensils.
- Clean out the gallon jar thoroughly. Use a dish soap with natural ingredients (no dyes) and rise extremely well. Alternatively (and more safely), rise out the container with distilled white vinegar.
Instructions for Starter Tea
- Put starter kombucha and SCOBY into the gallon jar
- Bring 1 quart water to a boil. Add 1 cup sugar and stir until sugar dissolves. Add the tea bags and steep until the water is a dark, molasses-like color and the container is lukewarm to room temperature (upwards of 20 minutes)
- Pour the remaining two quarts of water into the gallon jar with the SCOBY.
- Pour the tea concentrate into the gallon jar.
- Place the covering over the mouth of the jar and wrap the elastic band around it.
- Store the jar out of direct sunlight but in a relatively warm place.

Bottling and Fermenting
- After about two weeks to one month (shorter time period in warmer weather), the kombucha will be ready. After about 2-3 weeks, test small amounts every couple of days to ferment the kombucha to your liking. You should no longer taste the tea; and the longer it ferments, the more sour and vinegar-like the kombucha will taste.
- Once the taste is satisfactory, you are ready to bottle! Making sure to keep the SCOBY and at least 1 quart of starter kombucha in the jar, pour the rest into the mason jars/bottles/plastic bottles.
- After tightly sealing the kombucha in bottles, store in a warm place to carbonate and undergo the second ferment for about a week. You should be able to see bubbles, however, depending on how much sugar and tea was used, the carbonation will vary. Sources say that you will not be able to squeeze a plastic bottle once the kombucha inside is carbonated, however, in general, I would steer clear of plastic because the material may have harmful effects/release contaminants into the kombucha itself.
- It is at this point that flavoring can be added—fresh or frozen fruit, honey, ginger, and lemon are some of my favorites. Add these ingredients to the second ferment—but as a general note, adding sugar (like honey or fruit) will increase carbonation. Be wary of exploding bottles!
- Re-make the starter tea, and start the next batch!
Notes
- Alternatively, it is possible to boil all of the water and dissolve the sugar and tea into that. However, I have found that it takes far longer to cool.
- When experimenting, it’s always a good idea to separate the new batch from the old one in case you accidentally kill your SCOBY or ruin the entire batch. Accidents are part of the process, but it would be a shame to lose everything.
- Switch up the sugar type! I have heard that you can use honey, raw/demerara sugar, maple syrup, agave nectar… feel free to experiment.
- Actual amounts can vary depending on how the kombucha is tasting. Is it not fizzy enough? Perhaps add more tea and sugar. Too sour? Perhaps add more sugar. Too sweet? Tone the sugar down and ferment for longer.
- If you want more than one batch of kombucha every month, consider purchasing a larger container with a spigot at the bottom (3-5 gallons, generally) and starting a continuous ferment. This way, you always have kombucha on tap, ready to drink! www.culturesforhealth.com/learn/kombucha/kombucha-continuous-brewing-system/